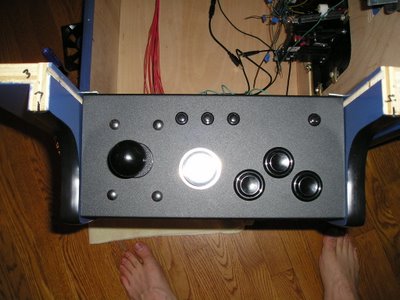
Holy crap!!! An update!!!OK, I'm not finished or anything but I have made a lot of progress since the last time I posted. You probably can't tell from the pictures but I will do my best to explain what I have done. I'm up to the part where you have to pick out a computer and install it in the cabinet. I have never built a computer before so it is going to be the most difficult part for me to do and I seem to be stalling. I want to be able to play some of the more modern fighters like Killer Instinct, Mortal Kombat 3, Street Fighter Alpha 3, etc. so I need to put something together that is a little bit faster than most MAME computers. From what I understand though a really old computer will play about 90% of the games in MAME - that's what I'll put in my next cabinet I guess... Anyway, on to the updates:
This first picture is an overview of what's going on inside so far. As you can see, I've installed the Player 1 and Player 2 control panels and wired them up to the ipac which is the thing on the right where all of the wires go to (and it is what allows the buttons and joysticks to "talk" to the computer -
interface for
pc to
arcade
controls). The control panels screw into place underneath the cab (not pictured) and on the inside using the metal plates as you can see. Most people also use mounting blocks underneath each side of the control panels to hold them in place but I didn't have room in there and the metal plates are more than sufficient. They don't move at all. In addition, you can see that I installed the silver clips (above each side of the coin door) which are used to secure the tabletop to the body of the cabinet. There are corresponding brackets attached to the tabletop that the clips secure to when it is closed.

This next picture shows the ipac with the Player 1 and Player 2 control panels all wired up. I am using red wire for the Player 1 controls and blue wire for the Player 2 controls so I don't confuse everything. I also used black for the ground wires for each. The little blue pieces of tape were used on each with to label what button it belonged to. I also bought some electrical ties so it wouldn't look like a rats nest of wires in there when I was finished. The ipac plugs directly into the computer's usb port - it is super easy to use. I got it from
www.ultimarc.com. The controls actually work! I was able to test it out using my laptop. Also note, I used a 4.5" hole saw and my drill to cut out the hole for the 80mm fan. It is going to get pretty hot in there with a computer and monitor running and I want to make sure there is adequate ventilation. There is a hole on each side for intake and outtake fans. I am also planning to cut a hole in the bottom for a third fan and mount a fourth fan directly on the chassis of the monitor.

As you can see below, I also installed the speaker/fan grills on the outside of the cabinet. They were simple to install and the layout is mirrored on the other side. I am mounting a fan and speaker on each side of the cabinet. I am still undecided on whether to include the bass tube that comes with the 2.1 speaker setup. You don't really need it for MAME and it's just one more thing to heat up the inside.... maybe if there is room. If you look closely, you can see the grill on the right has exposed screw heads and the grill on the left does not. I want the finished cabinet to look as "professional" as possible so it's the little details that matter. I found screw head covers for $0.03 each at my local hardware store and they really look nice when they are installed as you can see from the grill on the left. I thought about spray painting the screws (black screws are very tough to find) but I am much happier that I found the covers - they really "finish" the look.

I also have pictures of the totally finished control panels with all of the admin buttons installed and I will post those later today. Thanks for looking!


